
Simple Tips to Stay on Top!

Nobody likes to think about the possibility of seeing their RC boat sitting inverted out on the water, but there will be a time when you’ll have to deal with a flipped-over marinecraft. In most cases, the hull will stay afloat due to the presence of some floatation material in the forward bow section of the boat. However, it is possible to add some additional, low-cost buoyancy to the hull and greatly improve your chances of surviving a flip with almost no water ending up inside the boat.
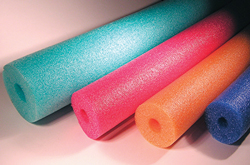
NOODLE FACTS
The extra buoyancy material that many boaters install in their hulls is nothing more than what’s called a “pool noodle”, which is a long, round section of closed-cell foam normally used to keep swimmers afloat in the water. Capable of holding an incredible amount of weight on top of the water, these brightly-colored noodles are also perfectly suited as RC boat floatation. They are tough enough to hold up inside any kind of powered, scale or sail hull in your fleet. Sold in a multitude of stores, these foam floats come in different diameters and can either be solid or have a center hole in their makeup. Matching the right size noodle for your boat’s floatation upgrade will only demand a tape measure to check the hull’s available noodle space. Then you can custom fit the foam using a cutting tool that you may already have in your kitchen’s junk drawer.
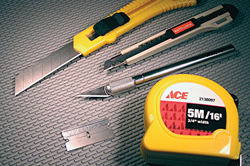
SIMPLE SHAPERS
Having done several projects that included the use of pool noodles, the best cutting and shaping tool I’ve found for this material is what’s called a “snap-blade” knife. These retractable blade knives have many uses and since their blades can extend up to three inches, they can make a single, clean slice through most pool noodles. For smaller cuts and for making notches in the foam, a regular hobby knife or a single-edge razor blade will work well as long as their cutting edges are fresh and sharp. As a precaution whenever you’re working with these tools, it’s best to keep the kids and pets away from the work area.

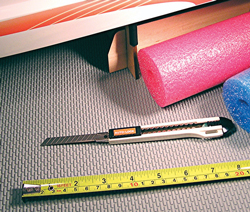
KEEP IT FLAT
To end up with an overturned hull that’s sitting almost flat and level on the water’s surface, your goal will be to insert sections of the pool noodle foam all around the boat’s interior sides and transom spaces. Situated up under the deck and hull areas, the closed-cell foam will be a press-fit to make it easier to install or remove the noodles for boat-servicing duties. Gluing-in the round pieces of foam is not a good idea as many adhesives won’t adhere to the noodle material and again, you’ll want to remove the added floatation on a regular basis. Plus, if you’re using this foam inside a nitro or gas engine marinecraft, it’ll be normal to sometimes replace a noodle section when it gets stained with fuel, shaft grease or if it gets torn from normal usage.
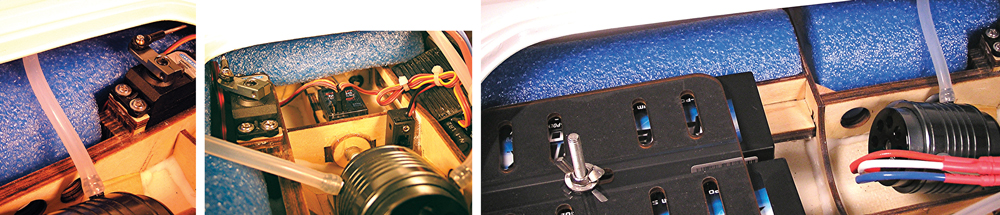
CUT AND FIT
If your boat features an upright bulkhead positioned just forward of the deck hatch opening, your side pool noodle pieces should run from the bulkhead to within a couple of inches of the hull’s rear transom plate.
Once you’ve used your snap-blade knife to create the side noodle sections, you may then have to remove a small notch or two to clear the servos, control arms, tuned pipe, etc., as you’ll have to give these parts enough clearance to work properly with the new floatation material inside the hull.
Now that you’re sure the round foam isn’t going to cause any binds inside the boat, you can trial-fit the noodle up underneath the deck edge and inner hull areas. Using a slightly larger piece of noodle might demand that you slice a thin slot along the length of the foam to get a good, tight press-fit on each side of the vessel and again, your snap-blade knife will make short work of the job.
After you’ve fitted the two side noodle sections, your final step will be to install a piece of the round floatation material across the small deck and transom space in the aft portion of your boat. Notches may again be necessary in the noodle’s makeup to clear the hull’s stuffing tube, exhaust mount, etc., plus the round foam may also need tapered ends to make it easier to remove the new floatation as needed. Done right, you’ll end up with an almost continuous ring of noodle floatation around the majority of your boat’s open space and this means it’ll stay right on the lake surface during the time between your flip and getting the boat back to shore.
PRO TIPS
> To save money on pool noodles, check the “buck stores” as they’ll usually have these items in their “pool toys” sections, especially in the summer months.
> Available in many colors, it’s possible to color-match your noodles to your boat’s outer finish, but you may have to check out several stores to locate the right color float.
> Although your “noodled” hull is now floating nicely after its flip, under no circumstance should you ever attempt to swim after the stalled-out marinecraft!
WRAP-UP
Even the best boat drivers around can suffer the occasional shunt, so taking a short amount of time to place some pool noodle floatation inside your hull will greatly cut down the time needed to remove any water in your engine, pipe or any of the boat’s onboard electronic components. If you’ve ever had to remove, flush and clean everything inside your boat after it’s endured a flip, it’s time to pick up a noodle or two to help prevent doing this lengthy job ever again!
Words: Rick Eyrich