
Blocking Water Gremlins
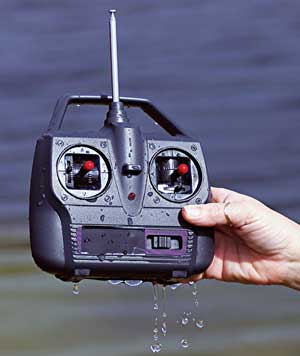
Unlike other types of RC enthusiasts, remote-controlled marine craft owners have to always deal with the possibility of water working its way into their boat’s electronics. Even a minimal amount of moisture can wreak havoc with the hull’s onboard receiver, servos and on/off switch; plus, the transmitter can also be affected by water contact as well. However, on the bright side, it’s relatively easy to protect your boat’s control hardware against any water gremlins with only a few items and techniques used by many boaters.
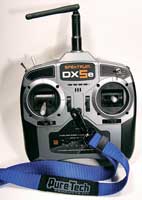
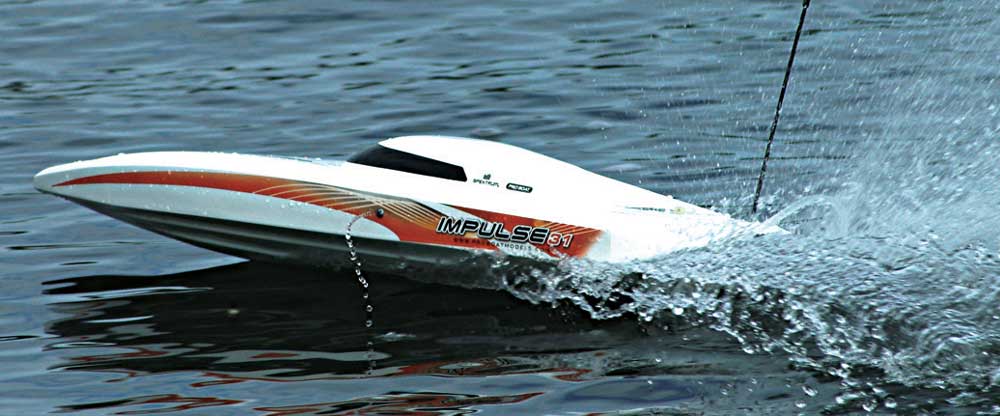
TX SUPPORT
Although many folks would never admit it, many boat transmitters get dropped in the water while the boater is either launching or working-on his/her boat. Having personally dunked my old 35 camera, I can attest to the hollow feeling of seeing a transmitter hit the water. You can avoid this disaster by adding a neck strap to your TX unit. Any aircraft radio strap or a good camera strap will work on an RC boat controller and you can adapt any non-strapholding transmitter by adding a small metal eyelet to the TX’s outer case. A wider strap will be more comfortable if you tend to run your boat for extended periods as well as using one that’s adjustable to allow the user to tweak its length to suit one’s driving style.
SEAL FACTOR
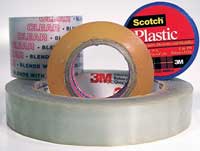
For any hull that features a large hatch cover on a flat deck, the addition of a sealing tape along its edges will help improve the boat’s waterproof levels, especially when running in rough water conditions. Purpose-made radio box tape, vinyl/plastic tape and even clear hockey stick tape will all create a good seal on the hatch/deck seams and they can be quickly removed to inspect anything inside the hull or radio box if needed. Clear tape is the most used however, many plastic tapes are available in different colors so you could color-coordinate them to suit your boat’s paintwork. In many cases a taped-down hatch cover has kept water from entering a flipped boat; so, you’ll always benefit from adding a layer of tape to your hatch seams.
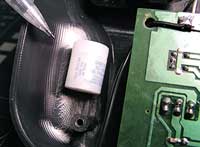
PLUGGING HOLES
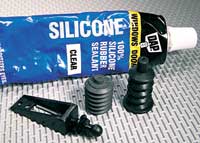
No matter how small the openings are anywhere on your hull, water can easily seep inside and ruin its onboard radio gear. Sealing-up all rudder linkages, power switches, antenna holes and the boat’s transom hardware mounts with rubber grommets, silicone sealant and even remote on/off switch mounts will prevent moisture problems with your electronics. Mounted on the deck or on the outer wall of a radio box, the Du-Bro Kwik Switch Mount will prevent direct water contact with the receiver’s power switch while small rubber bellows can be silicone or CA’ed to the hull’s rudder linkage hole running between the steering servo and the rudder blade.
ONBOARD ABSORBERS
Found in many pill bottles, the small white plastic moisture absorbers can also be used to pull water away from your transmitter or the boat’s control components. Installed in the TX via either Velcro or a small dab of silicone sealant, the absorber will draw dampness that’s managed to creep into the transmitter case and this trick is also doable on any hull with an inner sealed radio box setup. Replaced at least once per boating season, the pill bottle absorber makes it easy to prevent any corrosion buildup around your transmitter/receiver circuit boards or the battery connections anywhere in your radio system.
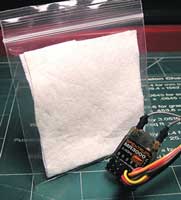
CLEAR RX COVER
For many years small party balloons have been used to encapsulate boat radio receivers, but now you can rely on a combination of a small resealable bag and a section of paper towel to shield the RX against water glitches. After inserting the paper towel inside a small zip-style plastic bag the receiver is situated alongside the toweling and the bag is secured with a nylon tie-wrap. As a backup to the tiewrap, applying a thin bead of silicone sealant around the leads exiting the bag before you lock the tiewrap in place will block water from reaching the RX; then, if you see any droplets of water inside the bag you know it’s time to open it up and dry out the receiver.

SPONGE BLOCKER
To help block water once it’s inside your hull a regular kitchen sponge can be placed around the radio components to suck up the H20 before it enters the RX, servo, etc. Simply cut it to fit snugly around the electronics, the sponge can be removed and squeezed to displace the moisture in the boat’s bottom. Sliced into long, thin strips, the sponge is also useful to pickup any excess water in the hard-to-reach spaces of your hull or radio box. Keeping several sections of dry sponge in your toolbox will pull even the largest amount of water out of an open mono-hull running in heavy-wave conditions!
POST-RUN PROTECTION
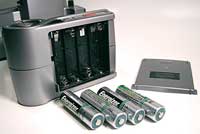
If your boat transmitter gets wet, the first step to stop any electronic problems will be to remove the batteries from the affected radio gear. Both alkaline and rechargeable cells hate any contact with water and in the event that moisture reaches them the boater must detach them from the system to avoid a short or the cells venting their chemicals into your TX/RX units. Done right after a flip or a sudden encounter with a large wave, the batteries can air-dry as can the holder inside the controller or radio box. In extreme cases the batteries may have to be taken apart to completely remove the unwanted H20. On a fast electric boat using a NiMH or LiPo battery pack wrapped in heat-shrink tubing, the tubing may have to be removed to fully inspect the cell connections for moisture; but, this step will prevent any corrosion damage when the dried-out pack is recharged.
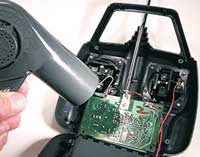
EXTREME DRYING
In the event your boat’s radio system takes on a big shot of water, it may require some extra heat to eliminate any moisture buildup on their internal circuit boards or wire connections. To access the boards you’ll have to break down the transmitter, receiver or servo case to easily access them and then dry the boards with a light-duty hair dryer. Turn the dryer on its slow or lowest-heat setting, keep its nozzle end about a foot away from the circuit board area and then sweep the dryer back and forth across the board surface for a few seconds. Your goal will be to dry the board without loosening its solder joints and once you feel it’s almost dried-out the radio component can be allowed to air-dry completely on its own. After reassembling the radio equipment, check it for proper operation and reinstall it in your boat.
PRO TIPS
• Besides using a household sponge to displace water from a boat you can also employ a regular turkey baster to suck out any H20 from the tighter confines of your hull.
• Reduce the amount of friction between the rudder servo linkage and the rubber bellows with a bit of drive grease. This will keep the linkage lubricated for bind free movement and act as a seal from water.
• Too much adhesive on the hatch-sealing tape can remove the paint or graphics from your boat; so, lightly running the fresh tape across your pant’s leg will remove enough “sticky” so that the tape will still seal the hatch seams without ruining your boat’s finish.
WRAP UP
By eliminating any water from entering your boat or by quickly removing any moisture that has managed to penetrate your hull, there’ll be fewer radio headaches encountered at the lake and less of a drain on your personal boating budget for replacement radio gear. Nothing in the world is completely waterproof, but with only a bit of tinkering you can make your boat almost as watertight as the underside of a duck!
Words by Rick Eyrich