
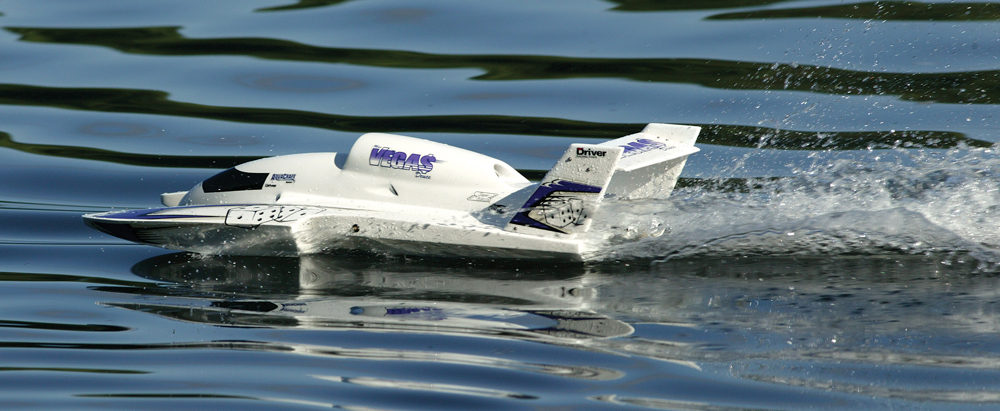
Go Fast, Don’t Be Last…
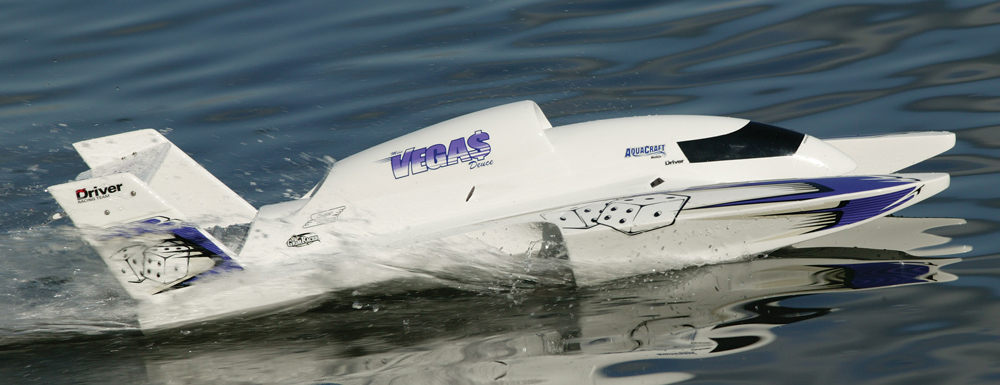

So you picked up a nice RTR boat. You’ve pulled it out of the box and took it to your local pond and ran some batteries though it. Then your buddies got a look and thought it was pretty cool and decided to pick up some boats of their own. Now it’s less about having a good time on the water and more about your boat being faster than theirs. Racing your buddies is fun isn’t it? So, now you want to try racing and while you can do it with your stock RTR boat, it won’t be very competitive against that crowd. The boats they are running are well tuned and no matter how much power you have in your boat they will out perform your RTR boat. That doesn’t mean that you have to go out and buy expensive gear to be able to keep up with those guys. With a few easy modifications you can be just as fast as the guys at the local boat club. Let’s tear that RTR boat apart and get ready for some racing.
THE HULL
These next steps will take a bit of time to make happen but in the end it will be worth it. You’ll want every advantage you can to get your boat as fast as possible. This will make your boat faster, more consistent and able to turn much better than before. Chances are the boat you have has a fiberglass hull and due to the manufacturing process there will be dips in that hull. The reason for that is that the hulls don’t sit in the mold for very long and as the fiberglass and resin cures there can be some slight tweaking of the hull dimensions. This will result in a boat that isn’t consistent from one turn to the other.

STRAIGHTEN IT
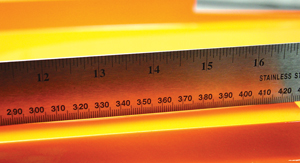
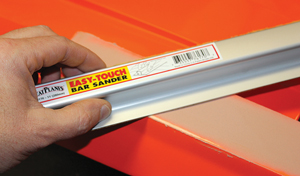
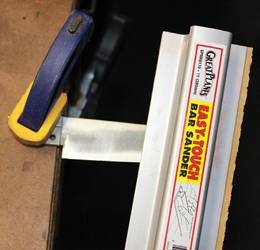
You’ll want the hull to be as straight as possible for racing. For this you’ll have to strip down your boat to a bare hull. Take a long flat ruler and lay it on the bottom of the hull on its side; this will show you how straight or wavy your hull is. If you see any light below the ruler then you have a dip in your hull in that particular spot. Check the hull in several areas and mark the beginning and end of each dip with a pencil so that you will know the areas that need to be filled. On a V-hull check the hull from front to back to make certain the straosponsons are straight. To fill those areas, I like to use Bondo Glazing and Spot putty filler; it goes on smooth and dries fast. Apply a coat of filler to the low areas with a plastic spreader and let it dry. When it’s dry you can sand it with a long sanding block to blend it into the hull. 400 grit sandpaper is a good grit to start with when it comes to leveling out the filler. Once you’re happy with the results, you can coat the filler with some thin CA to strengthen the filler.
MAKE SURE IT’S FLAT
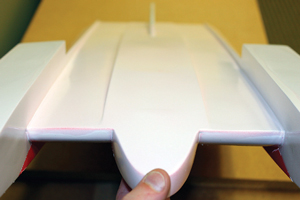
When you have a catamaran, tunnel hull or hydro you may find that when it’s sitting on a flat surface you can push on a corner and the other corner may lift. This means that the sponson height on each side is different and that will have to be corrected. When you place your hull on a flat surface and push say on the front right corner the rear left corner may rise up slightly and when that happens you’ll want to measure the distance between the flat surface that the boat is sitting on and the bottom of that sponson. Since there will be a small gap you can simply place pieces of paper under the sponson and pile the pieces up until the hull no longer rocks back and forth. Then you can remove the sheets and measure the thickness with a ruler or pair of calipers. Some may use filler to build up that section of the hull until the boat sits perfectly flat, but that can possibly be a problem later. When you build up the filler too much, it becomes fragile and can chip off if you happen to hit something with that particular section of the hull. If you find that your hull is off by a millimeter or more you’ll want to build up that area with plastic sheet. Evergreen Plastic sells sheets in several thicknesses and you’re sure to find the thickness that is perfect for your hull. All you have to do then is measure the length of the area that needs to be built up and cut a piece of plastic with the appropriate thickness to fit. You can attach the piece to the hull with some 2-part epoxy. Once the epoxy has dried you can blend it in with some filler.
SHARPEN IT UP
The sharper the features on your hull the better it will turn. So if you have any strakes or corners anywhere on the bottom of your hull, you’ll want to sharpen them up. The closer you can get them to a point the better. You can do this by putting some filler on the corner and once it’s dry, use a small sanding block or emery board to sand it down to a clean sharp corner. A few coats of filler may be required to get it all dialed in.


PAINT IT
Once you’re done with all this sanding and filling, the bottom of your hull won’t be as pretty as it was before. Some painting will be required to not only cover up the mess, but also to smooth out the bottom of your hull at the same time. Sand the entire bottom of the hull with 600 grit sandpaper while being careful not to mess up all your hard work. Mask off the bottom of your hull and give it a light coat of primer, then give it some color. You don’t have to worry about getting the right color to match your hull; a nice coat of white paint goes with pretty much anything.
DRIVETRAIN
The more efficient the drivetrain is, the faster the boat will go. It will also last a little longer on a charge because it will take less electricity to push the boat up to race speed. Another advantage to having a very efficient drivetrain is that you’ll have less strain on your electronics and therefore they will last longer.
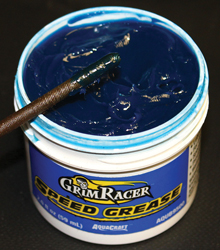
GREASE THAT FLEX CABLE
Greasing the flex shaft is a simple maintenance step that a lot of people skip or only do every few runs. The easier it is for that flex shaft to spin the better. As time goes by, the grease used on the flex cable breaks down and eventually exits the tube, leaving the flex cable with a sticky residue which will slow it down and cause it and the stuffing tube to wear. To keep this from happening, coat your flex cable with grease before every run.
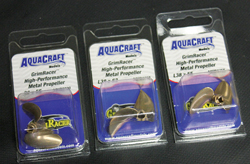
PICK A PROP
Before going to your first race, head down to where you’ll be racing and see what others are using for props in the class you’ll be running in. Chances are good that someone there has found a good combination of size and pitch that will work best for the power system you have in your boat. Once you have an idea of the popular prop for that class you can pick one up for your boat. While you’re at it, pick up a few others so you can start to experiment for yourself. Pick one that is slightly larger, one that is slightly smaller, one that has more pitch and one that has less.
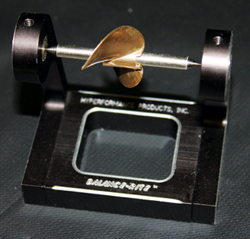
PREP YOUR PROP
A sharper prop will cut through the water better and make it more efficient. Remove material from the edge of the prop with a file to sharpen it up and make sure you sharpen all the edges of the prop. Once you’re happy with the how sharp your prop is you’ll want to get it on a balancer to make sure it’s not thrown off by the work you just did. A prop that isn’t balanced will cause a lot of vibration in your drivetrain and slow things down. When removing material from the heavy side of the prop, make sure you remove material from the leading edge of the blade. With sharpening and balancing out of the way, you can finish off the prop by polishing it. This will allow it to cut through the water even better.
GET THE BALANCE RIGHT
Make sure that you get everything placed in the hull in such a way that the left to right side balance is equal. This will affect the boat in the turns and if you have more weight to one side, the boat will steer better to one side than the other. That’s OK if you are running in an oval but if there are left and right turns on the course you’ll want that balance to be as perfect as possible.
MISCELLANEOUS
Here are just a few more tricks to make your boat faster and handle even better.
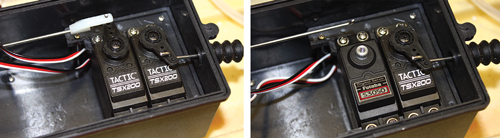
UPGRADE YOUR STEERING SYSTEM
Remove the stock steering servo and replace it with a servo that has higher speed and more torque to not only muscle the rudder around, but to also react as fast as you do at the wheel. Chances are that if you upgrade your steering servo it won’t be waterproof. Before you install that new servo, put grease around the output shaft, silicone around the area where the wire goes into the servo case and cover the seams with electrical tape. This isn’t going to make the servo 100-percent waterproof, but it will keep water out long enough for you to dump water out of the hull and dry it out if you happen to get any in there.

INSTALL A NEW LINKAGE
You’ll never be able to take full advantage of that new steering servo while using the stock thin wire steering linkage. It has a lot of flex in it which will dull down the reaction time of the steering servo. It will have a hard time keeping the rudder in line with the servo arm. Ditch the stock wire steering linkage and replace it with heavy duty ball ends and a turnbuckle. An aluminum or titanium turnbuckle would be best because they are lightweight and won’t rust after being exposed to water. When installing a turnbuckle, you may have to open up the steering boot a bit to make room for the thicker linkage.
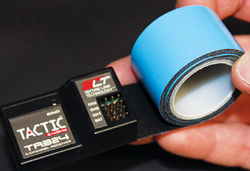
SECURE IT
Many boats use Velcro to secure the electrical components such as the speed control and receiver in the hull. Even the batteries are held in place with Velcro and most of the time there’s no way that the Velcro is strong enough to hold the batteries in place, especially in rough water. When you get your boat back to shore after a hard run you may find that your components have shifted and that throws off the balance and performance of your hull. Steering servos sometimes aren’t securely mounted either. They are usually just sitting between the mounting blocks and can move around and that will throw off your steering. Take the time to properly secure all of the components in your hull. I like to secure the speed control, receiver and servo with double sided tape. Make sure you clean the bottoms and the spots in the hull where they will be mounted with motor spray to ensure that the electrical tape sticks properly. For the batteries, you can use a reusable wire tie or Velcro straps.

USE TAPE
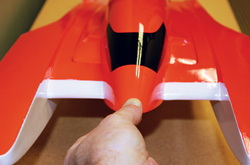
A lot of RTR boats use some sort of magnet or latch system to secure the canopy and while running the boat you may have noticed that they don’t hold up very well in rough conditions and end up coming off. When racing you’ll see that the water conditions are always rough and there’s a good chance that if you use the stock system to secure your canopy it will fail and your race will be over. Remove the mounting hardware from your canopy to lighten it up and use tape to keep in place. It may not be all that good looking, but it’s guaranteed that it will keep your canopy in place. Since you’re using tape to secure the canopy you can also ditch the canopy seal if your boat has one. The tape will keep any water out and by ditching the seal; you can further reduce the weight of the boat.
SWAP IT OUT
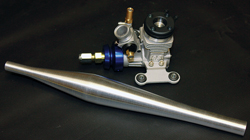
Depending on the class that you are running in you may want to swap out the stock electronics for something a little more powerful. If you haven’t figured it out already, speed is king when it comes to racing. Some “stock” classes require you to run the stock motor and that’s about it. So in those classes you’ll want to shop around for a speed control that may be more efficient than the one you already have. Chances are that the stock ESC is going to do the job. In other classes you’ll want to take a look at the motors and speed controls that the fast guys are running and upgrade to those or similar setups. If you’re a nitro guy you pretty much won’t stand a chance with your stock engine. You’ll quickly find out that not only are the fast guys running hotter engines, but they are also running highly modified engines. You’ll also want to upgrade your tuned pipe to get the most power possible out of your engine. Just like with a prop, you’ll want to see what combination of engine and pipe the fast guys are running before you buy anything.
SHARPEN IT UP
Just like your prop, the hardware on your boat will be able to slice through the water much better if it has a sharp leading edge. Items such as your rudder and turn fins (if your boat has them) are in this category. Remove your rudder and turn fins from the hull and sharpen the edges with a rotary tool and a sanding drum, grinding stone or similar tip. You can also use a belt sander to do the job. Once you have these components sharpened, polish the edge to a mirror shine to make them even more efficient. I highly recommend making some sort of protection for these components once you’re done. The slightest hit can dent your freshly sharpened edge. It can be as simple as two pieces of cardboard taped together and slid in place.
WRAP-UP
With boat racing it’s all in the small details; the more time you spend fine tuning the better. Take some extra time to think about the small things that may make a difference and make those adjustments. It doesn’t matter how small an improvement it makes, any improvement is better than no improvement and you may come up with some tweaks that the other guy didn’t even think of. Remember to think outside of the box and try something new. Just because the other guy isn’t doing it doesn’t mean that it won’t work.
LINKS
AquaCraft Models, aquacraftmodels.com, 800- 682-8948
O.S. Engines, greatplanes.com, osengines.com, 800-682-8948
RCFunBoats, funrcboats.com, 805-582-0005
Words: Ken Brenner