
 We love featuring scratch-built models from our readers, so when Kenneth Ruxton sent in an email inquiring if we would like to feature his custom New Zealand Tuna Model Boat, based on original blueprint design by R. T. Hartley’s of Takapuna, New Zealand, we jumped at the chance to show you this unique vessel. Kenneth sent us the story behind the boat and notes on the build and we’ll let his own words tell the tale…
 My granddad is in his retirement from being the skipper of a tender boat to the Land Bay Island off the coast of Howth Peninsula in Dublin Ireland. The boat docked in a town called Skerries all the time and one day he decided to go to Howth Village, only a short boat ride away, and there he fell in love with a lovely girl, my lovely grandmother Rose. After getting married and leaving the job as skipper of the Landbay boat he became a painter and decorator for a company where he also worked maintaining a road steam roller. Anyway, eventually he retired and in his retirement he decided to build a boat as a pastime. He purchase the blueprints for a New Zealand tuna boat, basically a small motor launch which was designed for an inboard motor and he decided to convert a ford engine to a marine engine. This man was amazing, and so he built the boat well into his retirement. He had a grandchild named Lorraine and that is where he got the name for the boat, his wife’s name and his granddaughter’s name, “The Lorraine Rose”. Unfortunately the boat was eventually sold and it met its doom and sank in a harbour in Co Arklow where the drain bung was left out when she was put back in the water after being cleaned and drained.
THE MODEL BUILD
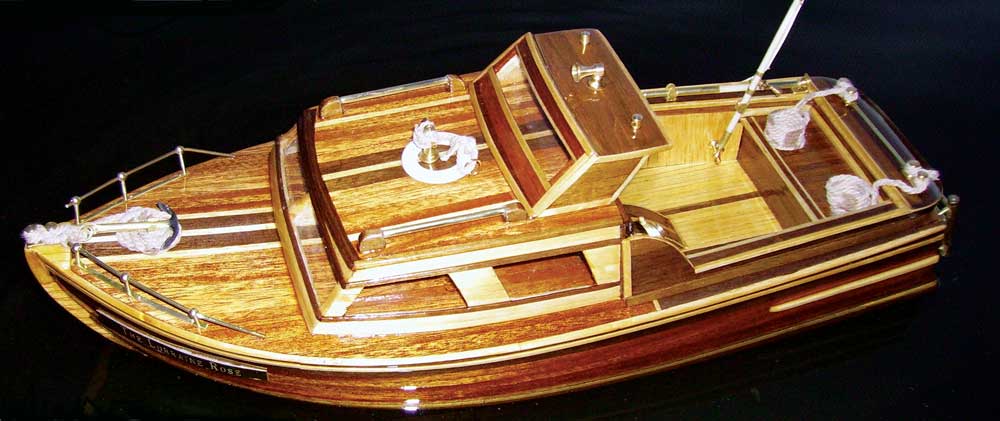
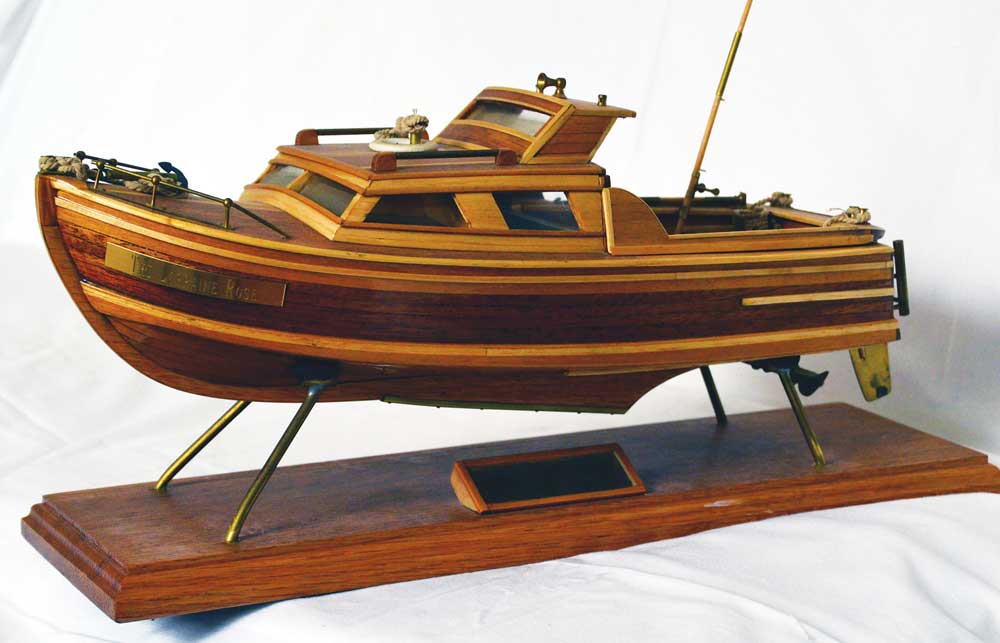
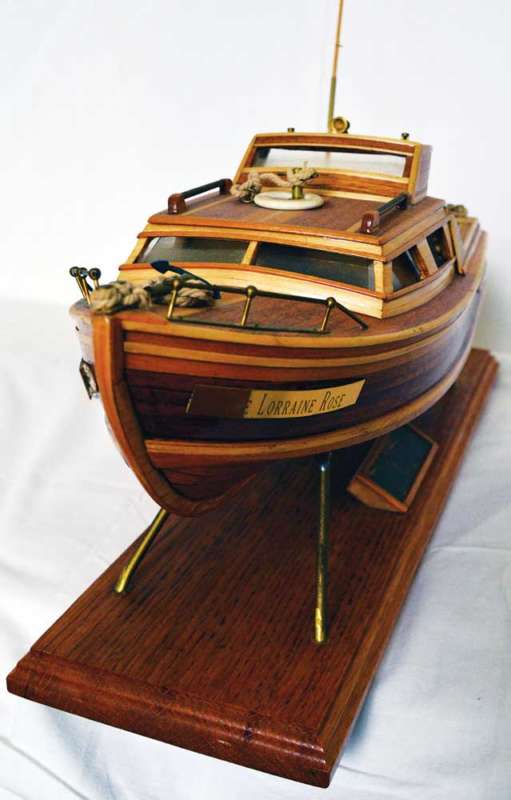
 In time I decided to build a model of the boat using the original blueprints. By the way, back in those days the royalties for the boat designer was a fee of £2 for the plans, that’s how long ago it was. Anyway, having a very important job ahead I spent some time thinking about the build. Eventually I decided on a hardwood finish, multi coloured wood strips and brass fittings with a brass nameplate on the front of the boat.
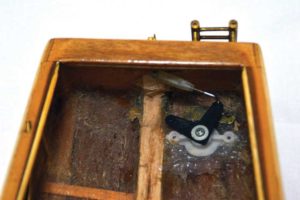
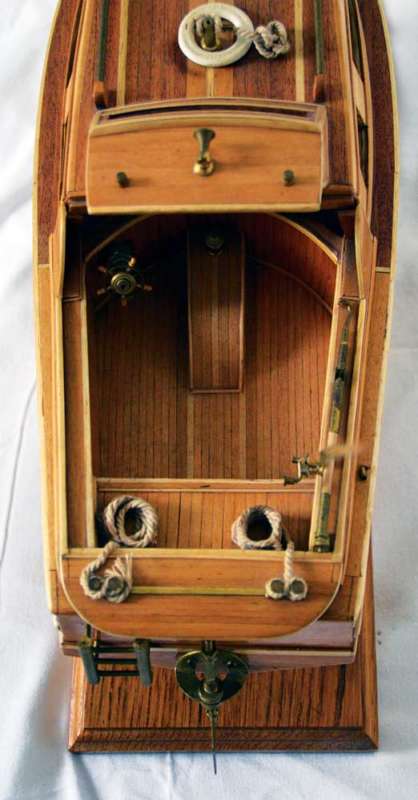
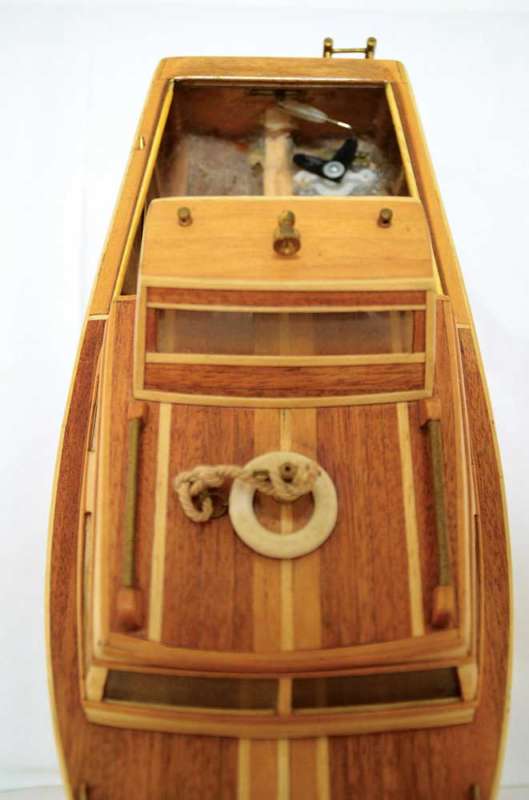
It was important to remove the ribs from the hull so as to have more room for the remote controls, battery and receiver. I knew the boat would be a lovely finish and didn’t want to ruin it with a switch. That’s when I chose to put a toggle switch where the steering wheel is but I would decorate the switch with brass and wood to create an old-style schooner wheel. It looked really good when it was finished, a little glue, a thin strip of brass and some model boat leftovers and the wheel could not look any better!
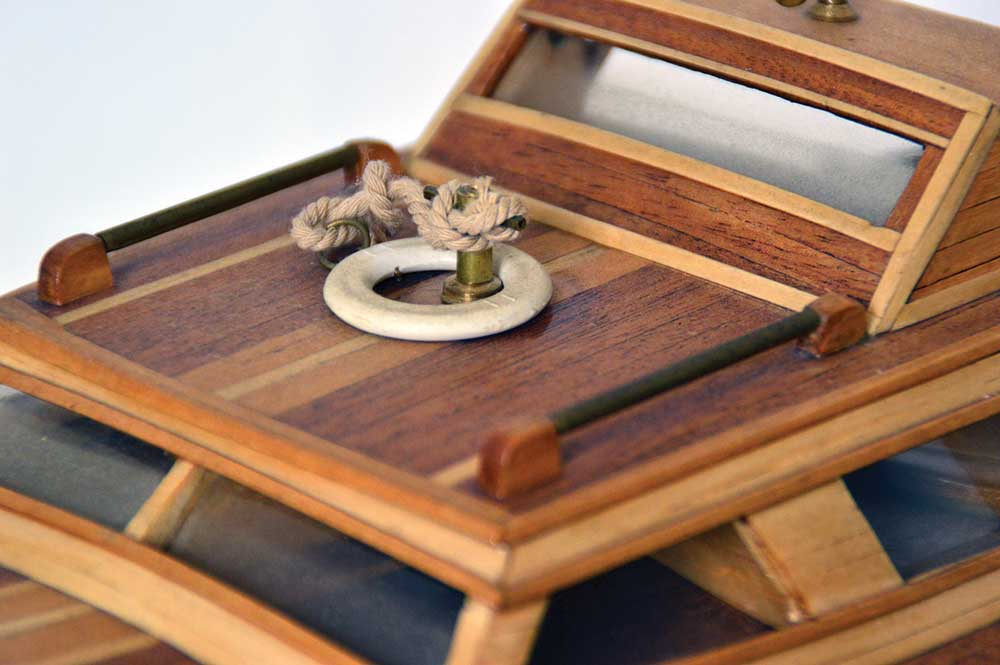
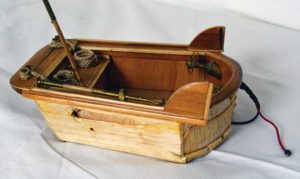 Making a compartment that could be removed as easily as possible was a challenge because it had to be easily accessible for changing the batteries and charging. It took time to make it look right. Because of being used to making curves I knew that curves incorporated in the design of the removable compartment would look good at the cabin door, or at least where the cabin door should be, without ruining the look of the wooden finished interior. I also had to incorporate room for the driveshaft running to the back of the boat, so I added the fixed rounded engine compartment and it looked OK when finished. To set it off I used dark wood to contrast against the light wood strips. It was trial and error with the removable compartment because I didn’t use any kind of measurements, I just made sure that it was symmetrical, which was enough to make it look like everything was engineered deliberately.
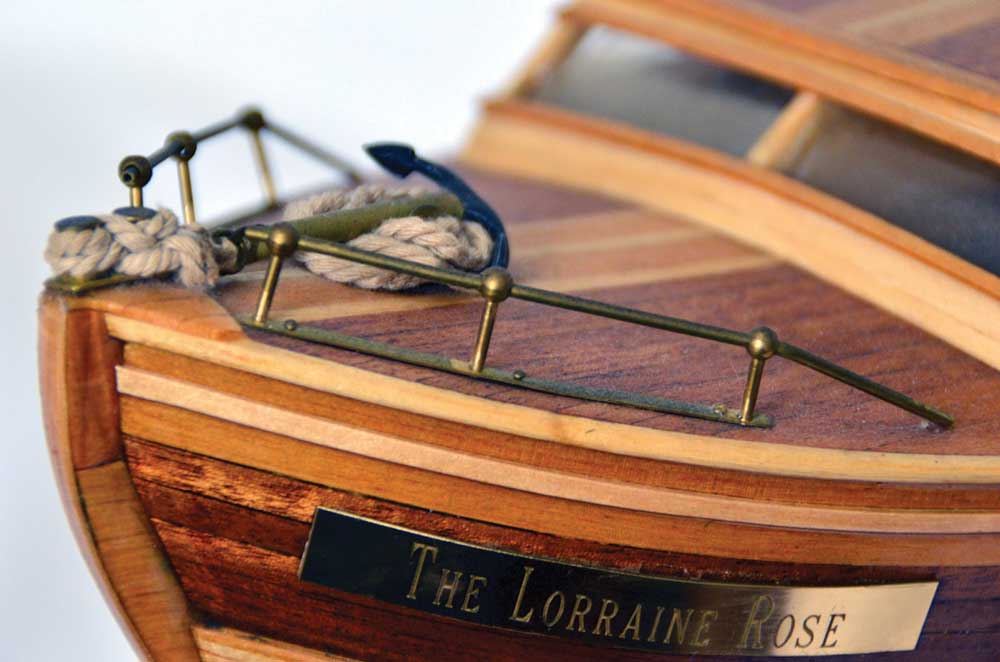
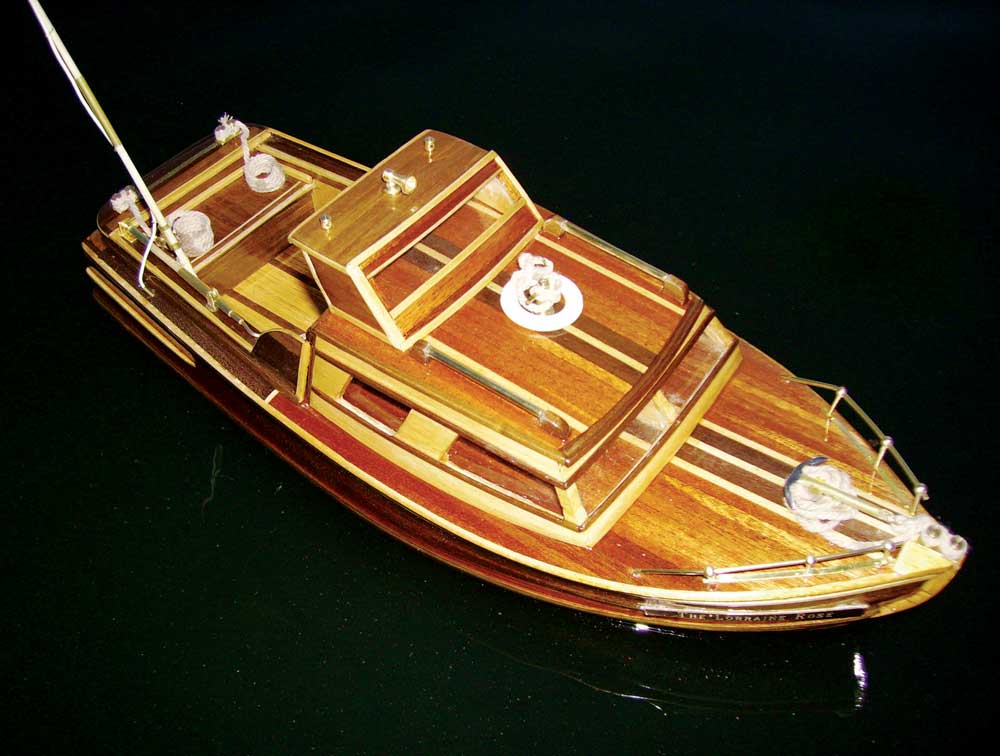 The brass fittings you see on the model came from an American coast guard boat, except for the braces for the prop shaft, the slotted plate on the back for the rudder arm and, of course, the ladder and parts of the fishing rod for the remote control aerial. I enjoyed the building of this boat because it has a few intricate parts that make it look interesting; I also added the curved area on the back of the boat to the rudder. When sailing, it makes for a nice wake in the water.
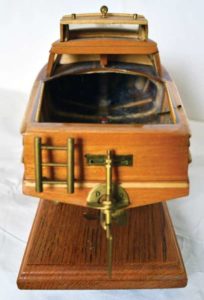
When the boat was planked on the balsa wood frame it was very strong and it was very heavy. The weight of the boat is actually quite heavy even without any batteries or electronics in it. I spent good time sanding it with harsh and then fine sandpaper and made sure that the boat got numerous coats of oil based yacht varnish, it turned out lovely and it was very shiny. The deck and the floor of the boat were covered with veneer strips and it looks brilliant—that and the brass fittings look as they should, the light wood runners really stand out! As a diecast model car collector I have used the tires on other boats and they look great, I tend to spray them white and use a colour string to tie them along the boat, it’s the small things that stand out.
This boat will go fast with a really good, strong motor, but all I’ve done so far is place it in water to float it. This boat was the longest build I’ve done yet and as you can see it was worth the hassle. To finish it I used a nice piece of hardwood for the base and with the brass tubing curved to suit the boat’s hull, it’s a good looking boat.
WRAP-UP
We’d like to thank Kenneth for the interesting story behind his model and build details. This unique build really caught our eye and we hope it inspires you to build a rare custom boat or a boat with personal meaning behind it. And if you do, make certain to share it with us by emailing use high resolution pictures and your story to: editors@rcboatmag.com